
Measuring plans
This page walks through measuring on a plan sheet. For product context, see Takeoff overview. After quantities look right, use Exporting quantities.
Left rail: Tools. Right panel: Quantities. Bottom-left: sheet scale (not viewer zoom).
- Create a project and upload a plan. From the project list, New project. Name the project, choose a Floor plan: one PDF, or one or more images (PNG, JPEG, WebP). Multiple images become pages. Create.
- Choose project units. First open shows Choose units for this project: Imperial (feet, SF, cubic feet) or Metric (meters, m², cubic meters). Confirm. Units also live under Project settings on the tool rail.
- Set the sheet scale. Drawing tools need scale. Use a detected suggestion (Accept / Edit), Set scale (notation or preset), or measure a known dimension. See Set scale below.
- Create classifications. In Quantities, Create classification. Pick Area, Linear, or Count, then name, color, and kind-specific options. There are no default classifications.
- Draw measurements. Activate a classification, then use Area, Linear, or Count (and Subtract / Opening when available). Review totals in Quantities before export.
Set scale
Section titled “Set scale”Scale is per sheet. Viewer zoom (bottom-right percentage, zoom to fit) is separate; never treat zoom as scale.
| Open it | What you see |
|---|---|
| Detected suggestion | Notation chip with Accept, Edit, dismiss |
| No scale | Label No scale and Set scale (bottom-left) |
| N.T.S. | N.T.S. when the drawing is marked not to scale; calibrate a known length |
| Manual dialog | Dialog title Set scale: field Scale from plan, presets (Architectural / Engineering, or Metric), Apply, or Or measure a known dimension on the sheet… |
| Calibrate | Measure known length; click two points; dialog Set scale asks for Known length (ft / in or m), then Apply (or Re-pick end / Cancel) |
Drawing tools stay blocked until scale is set. You’ll see Set the sheet scale first.
Classifications
Section titled “Classifications”Open Create classification from the Quantities panel (plus control or empty-state button). Create flow:
- What are you measuring? cards: Area, Linear, Count
- Form title like Create area classification (or linear / count)
- Fields: Name, Color, plus Pattern (area) or Marker (count)
- Create (or Back / Cancel when editing)
| Kind | What you’ll see | Extras |
|---|---|---|
| Area | Surfaces such as floors, ceilings, and slabs | Quantities outputs (up to 3): Area, Perimeter, Volume (with Height), Tile count (Width / Length / Gap). Patterns: Solid, Diagonal, Crosshatch, Dots, Horizontal, Vertical |
| Linear | Length for walls, baseboard, and pipe | Optional Wall height (enables wall area and Opening) |
| Count | Fixtures, doors, outlets, and other point items | Marker: Circle, Square, Triangle, Diamond, X. Quantity is EA (one marker per click) |
Edit classification opens the same form. Kind is locked when items already use that classification. Delete confirms when items exist.
Drawing tools
Section titled “Drawing tools”Left Tools rail:
| Tool | Shortcut | Notes |
|---|---|---|
| Select | V | Default when scale or active classification is missing |
| Area | D | Needs an area classification once any classifications exist |
| Linear | L | Needs a linear classification |
| Count | N | Needs a count classification; stamps on click |
| Subtract | S | Needs an area selected (holes) |
| Opening | O | Needs a linear wall with height selected |
If a tool is not ready yet, Takeoff shows a short reason such as Create an area classification first, Create a linear classification first, Create a count classification first, Select an area first, or Select a wall with height first.
Area shapes
Section titled “Area shapes”While Area or Subtract is active, bottom-center Draw shape strip:
| Shape | Shortcut |
|---|---|
| Polygon | P |
| Rectangle | R |
| Ellipse | C |
| Arc | A |
When classifications exist but no items yet: click a pattern swatch (or double-click a row) to draw; for area, click the first point to close; for linear, Enter to finish; double-click to gap (full-height skip).
Quantities panel
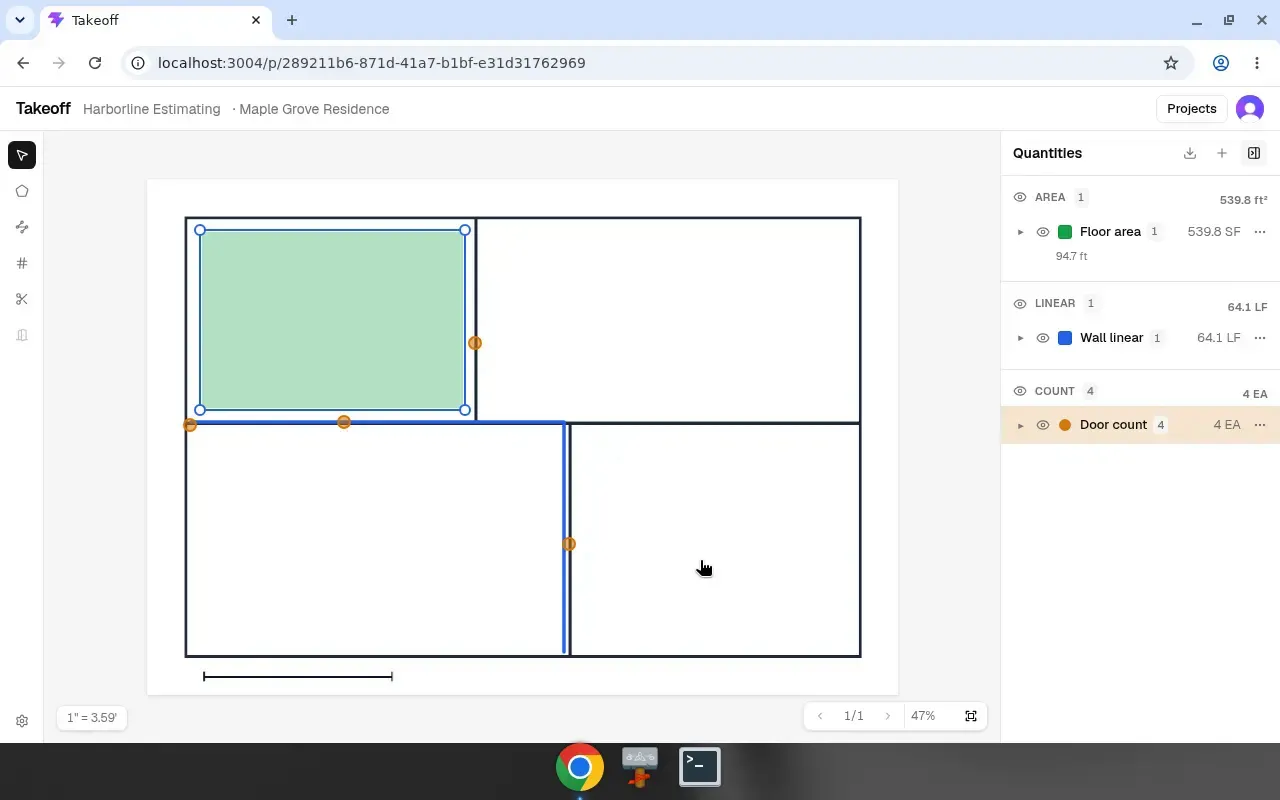
Section titled “Quantities panel”Panel title: Quantities. Groups by kind (Area, Linear, Count) with per-classification rows and derived totals (for example SF / LF style length units from project system, and EA for count).
Useful actions on the panel:
- Create classification
- Show / hide classifications on the plan (eye control; isolate with modifier click)
- Edit / delete classification from row actions
- Export CSV when the project has exportable measurements (full export steps: Exporting quantities)
- Collapse / expand (Hide quantities / Show quantities)
Select measurements on the canvas or in the list to inspect, rename, reassign, or remove. Opening rows appear under linear walls that have openings.